
Want to Create a Hibernate Application using NetBeans IDE and MySQL in just 7 minutes ?!
Well, We will learn how to add MySQL library and Hibernate library to NetBeans IDE, and how to make small application to connect Hibernate to MySQL, So stay with us.
Contents:
1- Add MySQL library to NetBeans IDE.
2- Add Hibernate library to NetBeans IDE.


4- Make the first Hibernate application and connect it to MySQL Server.




Download Source Code:
read more...
Well, We will learn how to add MySQL library and Hibernate library to NetBeans IDE, and how to make small application to connect Hibernate to MySQL, So stay with us.

Contents:
- Add MySQL library to NetBeans IDE.
- Add Hibernate library to NetBeans IDE.
- Use MySQL Server to make small table.
- Make the first Hibernate application and connect it to MySQL Server.
- Download Source Code.
1- Add MySQL library to NetBeans IDE.
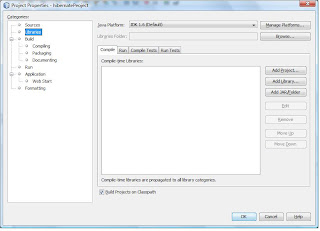
- Right-click on project name choose properties
- Click on library

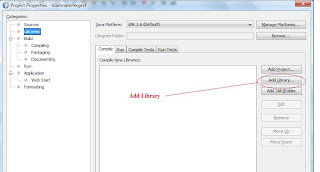
- Add library

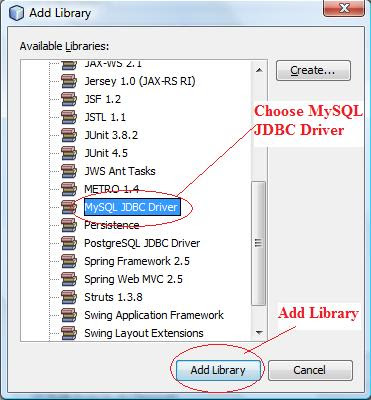
- Choose MySQL
- Add the library

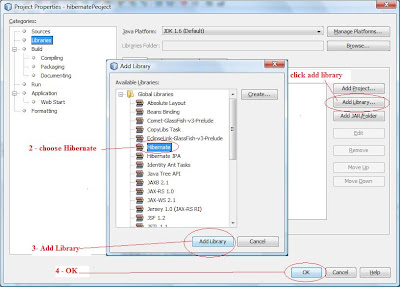
2- Add Hibernate library to NetBeans IDE.

3- Use MySQL Server to make small table
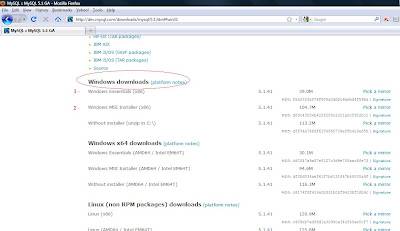
- Download mysql from ( http://dev.mysql.com/downloads/mysql/5.1.html#win32 )

- Install these two file the very important step
1- setting the password ( if you have loder version and removed it you will see current root password , if not you will not see it )(hint : we use password -- 12345)

2- Ensure that mysql server installed correctly (otherwise you must reinstall mysql)

4- Make the first Hibernate application and connect it to MySQL Server.
1. Make java application
2. Add mysql liberary and hibernate library
3. Build our database
Table name student (use default schema test)
Name | Age |
Ahmed | 21 |
Islam | 21 |
Ali | 20 |
4- build hibernate configuration file ( this file define you database engine ,your password , and driver that’s essentially to connect to mysql or other database engines) . configuration file is an xml file .it is name ( hibernate.cfg.xml ) . place in default package .
right-click on default -package choose other


Then click finish
- Now we will explain hibernate configuration file
5 – build java bean class . this class have fields that we name it in our database
Every table in our database have one bean implements database fields place it in default package .

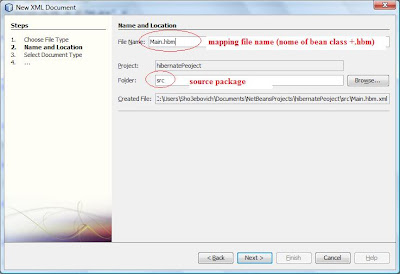
6- now build xml file have name like the java bean class name (in our project Main ) this file named with hibernate mapping file . we use this file to assign each attribute in our bean class to each field in our database.(hint :each table in our database has java bean class and mapping file to connect each).


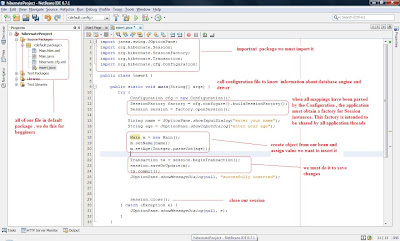
- Now to begin our first project we must do the main class we will name it (insert )

When you run the project

Download Source Code:
Thanks for your time and consideration and hope you enjoyed this tutorial.


